Installation Guide for Data Server on Windows
Installing the Data Server is a relatively simple process. Installation follows these basic steps (detailed below):
- Installing the Software
- Starting the Servers
- Stopping the Servers
- The Web Control Panel
- Setting up your Tiger Controller(s)
- Connecting to the Data Server via Telnet
Additionally you may need to check the following Firewall/Network related issues hould you have problems:
- Windows Firewall is configured to work with the ports you are running the Data Server on (9995 and 8080 are the default ports that the Data Server uses.). By default the Installer will try to add Firewall exceptions for ports 9995 and 8080, but you will need to do this manually if you are using the configuration file to use different port settings to the default.
- Your main network Firewall allows communication through the communication port (9995) and the Web Interface port (8080) if your Units will be communicating to your server through your main network Firewall. You may wish to disallow the Web Interface Port from having external access - these sorts of basic security precautions are up to you and your network team to decide.
- The network device in your Tiger Controller is set up correctly.
-
Installing the Software
Install the Software from the Installer. This will install the Software and configure the Servers to run as a Windows Services (http://en.wikipedia.org/wiki/Windows_service). There are two Windows services: the HTTP, and the TTP Server. The HTTP Interface is the the Web Interface accessable in a web browser, and the TTP Interface is the Data Port for the Texmate Tiger Controllers to send and request data from.

-
Starting the Servers
Start the Servers from either:
- The Programs Menu (Windows XP only).
- The Services Control Panel.
You can start (and stop) each server (
Texmate Data Server (HTTP Interface)andTexmate Data Server (TTP Interface)) independently of each other.Note: On Windows Vista (and later) you will need to use the Services Control Panel to Start and Stop the Data Server.
Note: The Data Server (both HTTP and TTP interfaces) are automatically configured to start (as a Windows Service) when your computer (server) boots into Windows.
-
Stopping the Servers
Stop the Servers from either:
- The Programs Menu (Windows XP only).
- The Services Control Panel.
You can stop (and start) each server (
Texmate Data Server (HTTP Interface)andTexmate Data Server (TTP Interface)) independently of each other.Note: On Windows Vista (and later Windows versions) you will need to use the Services Control Panel to Start and Stop the Data Server.
Note: The Data Server (both HTTP and TTP interfaces) are automatically configured to start (as a Windows Service) when your computer (server) boots into Windows.
-
The Web Control Panel
You should be able to to see the Web Interface by pointing your Web Browser to http://localhost:8080/ and http://localhost:8080/admin/ for the Web Administration Control Panel. Note that you will need to log in by default to the Web Interface - the username and password for The Administration Control Panel is
Administratorwhile the password is alsoadminby default. You can add, change, and delete users and passwords in the Administration Control Panel.Next up you will want to set up a Unit (a Unit is the Data Server term for a device that can connect and upload or request data from the server. It is not termed a Meter because more than one Meter can connect as the same Unit - for example one Meter sending and the second Meter requesting the data the first Meter send. Both connect as the same Unit to access the same data.) You set up a new Unit from the Administration Control Panel.
-
Setting up your Tiger Controller(s)
Now that your Unit is set up (with the Data Server) you will want to configure your Tiger Controller (or Meter) to communicate with it. You will do this with an App.
Texmate has an App Programming Tutorial available at texmate.com/macros/, or you can get started with the example apps listed in the main Help Menu of the Data Server.
You will need the Texmate Development System for loading your App into your Tiger Controller. This is a free download from Texmate, available at texmate.com.
-
Connecting to the Data Server via Telnet
For troubleshooting purposes, such as verifying all your firewall settings are in place, you may wish to confirm that the Data Server is able to accept connections by using a Telnet program such as PuTTY.
Below are some images so you can see how this process works. You will want to familiarize yourself with the Tiger Transfer Protocol first.
- Basic Request for some data for a particular Unit:
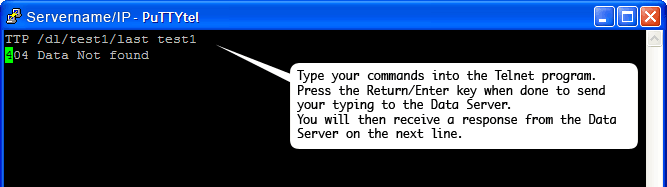
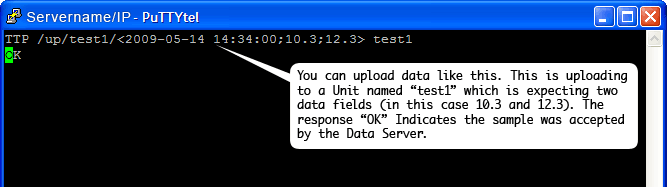
- There's no data for the Unit, so we can upload some:
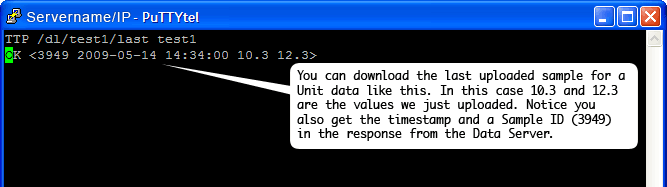
- Now we can get the download the data:
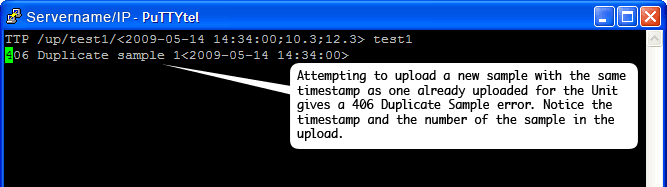
- This is what happens if we try to upload the same data again:
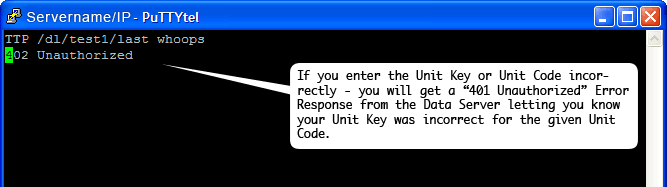
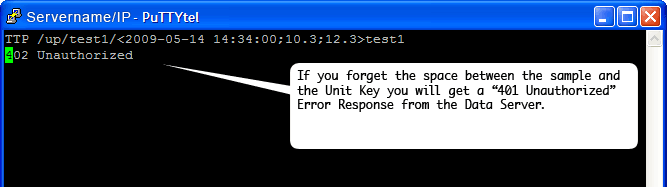
- Thee following are some examples of mistyping the Unit Code or Unit Key:

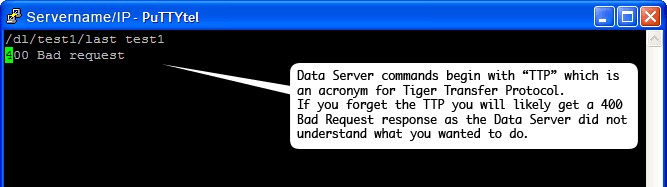
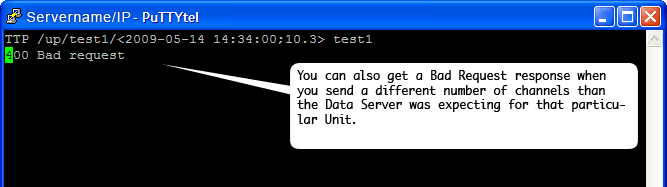
- These are some bad requests:
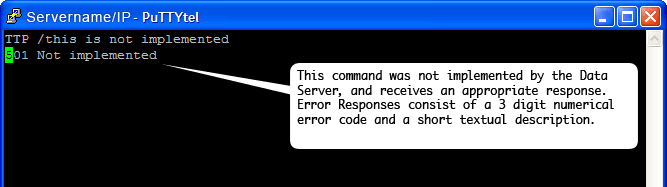
- This is not implemented as a server function:
- Basic Request for some data for a particular Unit: